زنگ تفریح ... گپ و گفت های خودمونی!

amin_rogh

كاربر فعال مهندسی کشاورزی
کاربر ممتاز
سلام دوستان
یه سووال دارم
تاپیکی برای درخواست طراحی برای باغچه داریم یا نه؟
راستش یکی از همسایه ها از من خواسته باغچه اش رو طراحی کنم ...
منم فکر کردم خوبه که از دوستان توی ایزان بخوام یه طرح توپ بهم بدن که پوز اینا زده شه.
ممنون میشم کمک منید.
قربان شما
امین رخ
 

mihua

عضو جدید
کاربر ممتاز
سلام دوستان
یه سووال دارم
تاپیکی برای درخواست طراحی برای باغچه داریم یا نه؟
راستش یکی از همسایه ها از من خواسته باغچه اش رو طراحی کنم ...
منم فکر کردم خوبه که از دوستان توی ایزان بخوام یه طرح توپ بهم بدن که پوز اینا زده شه.
ممنون میشم کمک منید.
قربان شما
امین رخ


سلام. حیاطش کوچیکه؟بزرگه؟.برا داخل میخواد یا جلوی حیاط و دم در؟
عکس برا الگو داخل سایتهای مختلف که زیاد هست...حالا نمیدونیم شما هدفتون چیه دقیقاً. که یه چیز خیلی جدید باشه که تاحالا کسی انجام نداده یا چی....
 

Phyto

مدیر تالار مهندسی كشاورزی
مدیر تالار
سلام دوستان
یه سووال دارم
تاپیکی برای درخواست طراحی برای باغچه داریم یا نه؟
راستش یکی از همسایه ها از من خواسته باغچه اش رو طراحی کنم ...
منم فکر کردم خوبه که از دوستان توی ایزان بخوام یه طرح توپ بهم بدن که پوز اینا زده شه.
ممنون میشم کمک منید.
قربان شما
امین رخ
سلام
همون تاپیک سوال و درخواست بخش فضای سبز مناسبه برای همچین سوالی
 

ni_rosa_ce

کاربر حرفه ای
کاربر ممتاز
هِلووووووووووووووووووووو مای فِرزندززززززززززززززززززززززز
هَو آر یووووووووووووووووووووووووووووووو
:دی تتلویی

:biggrin:
 

ni_rosa_ce

کاربر حرفه ای
کاربر ممتاز
هِلووووووووووووووووووووو مای فِرزندززززززززززززززززززز زززز
هَو آر یوووووووووووووووووووووووو ووووووو
:دی تتلویی


چه خبرا چیکارا میکنی؟ دکتر شدی ؟
سلومتی. دعا به جونت. نه هنو مونده :D
دکتر !!! :D بلده آمپول بزنه؟
واااا!
مگه دکترا فقط آمپول میزنن؟!

والا!


عاغا تو کانال من عضو بشید :w02:
 

*محیا*

کاربر فعال مهندسی کشاورزی ,
کاربر ممتاز
 

Takesh

کاربر حرفه ای
کاربر ممتاز
سلام . عید همه مبارک

یه زمانی همه آشنا بودن اینجا :biggrin:
 

Phyto

مدیر تالار مهندسی كشاورزی
مدیر تالار
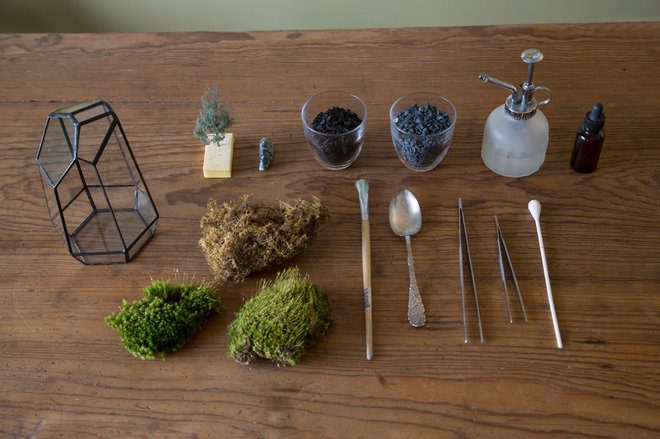
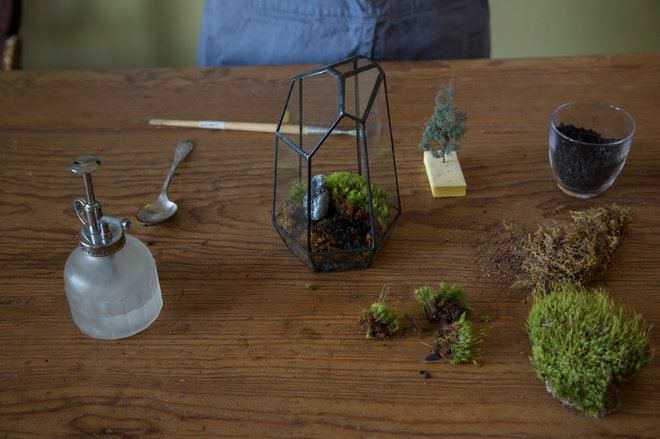
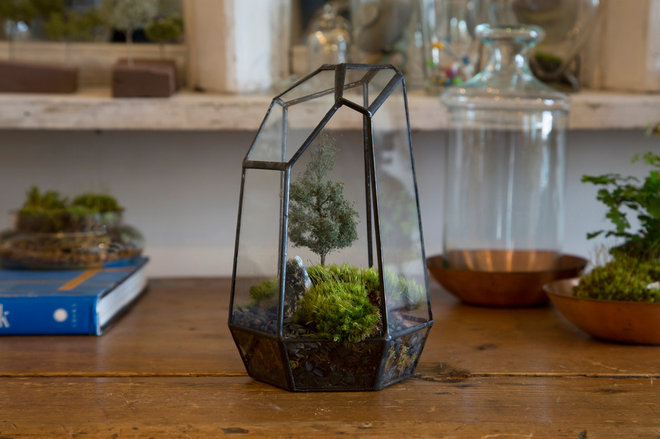
Moss is beautiful, even when poking through the cracks of a decrepit sidewalk or sprawling over a crumbling wall. It’s a plant that begs to be touched and invites a closer look. Follow along as Baylor Chapman of San Francisco’s Lila B. Design shows us how to put together a mini moss terrarium that’s sure to inspire joy and a sense of calm in any indoor space.


Margot Hartford Photography


Margot Hartford Photography

Plant Materials


  • [*=left]Sheet moss
    [*=left]Cushion moss
(Make sure you buy from a reputable source that harvests moss in a responsible way.)

Other Materials and Tools


  • [*=left]Glass vessel with opening (a cylinder vase or Mason jar could work)
    [*=left]Spoon
    [*=left]Rock
    [*=left]Spray mister
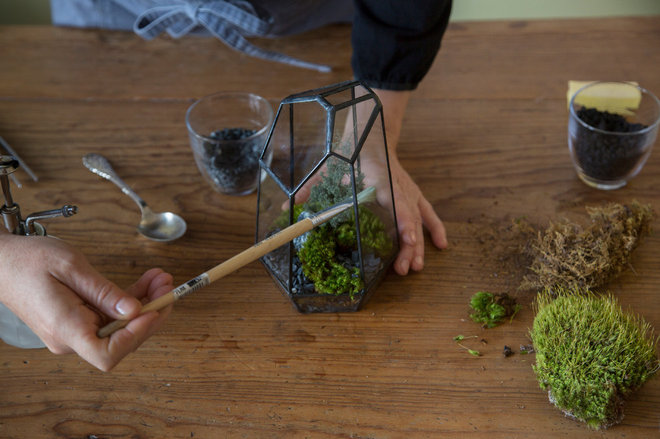
    [*=left]Paintbrush
    [*=left]Activated charcoal pieces (available in the aquarium section of a pet shop)
    [*=left]Decorative pebbles (aquarium pebbles work well)
    [*=left]Extra-long tweezers or tongs
    [*=left]Extra-large cotton swab
    [*=left]Medicine dropper
    [*=left]Architectural model tree (or any other accessories you’d like to place in your terrarium)


Margot Hartford Photography

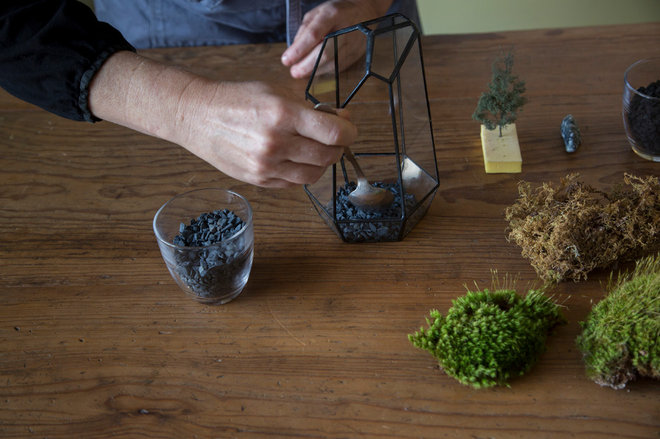
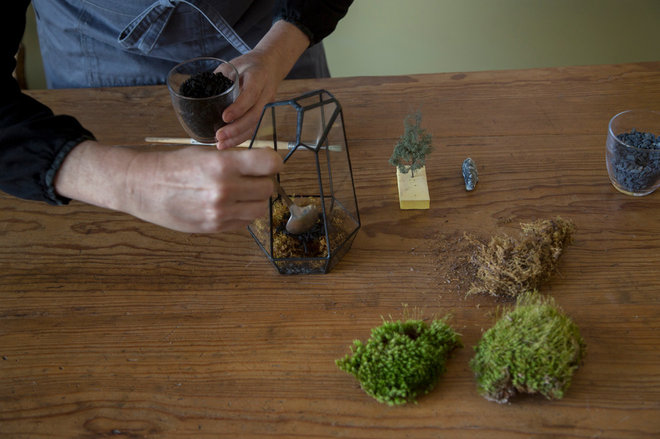
1. Using the spoon, place a layer of rocks, about three rocks deep, on the bottom of the glass vessel. The rocks will enhance the terrarium’s appearance and help drain any water that seeps through the moss, which you’ll add next.


Margot Hartford Photography

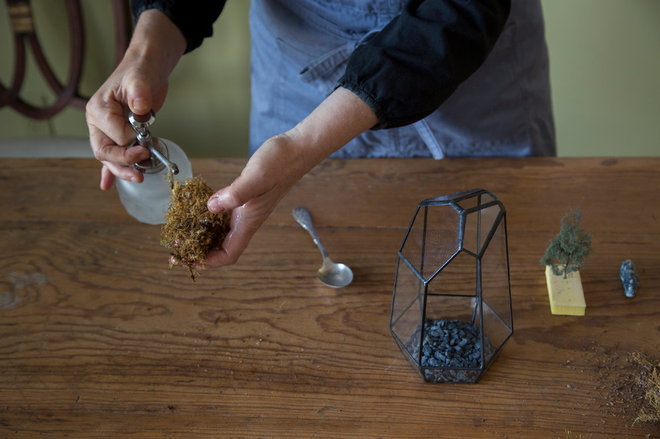
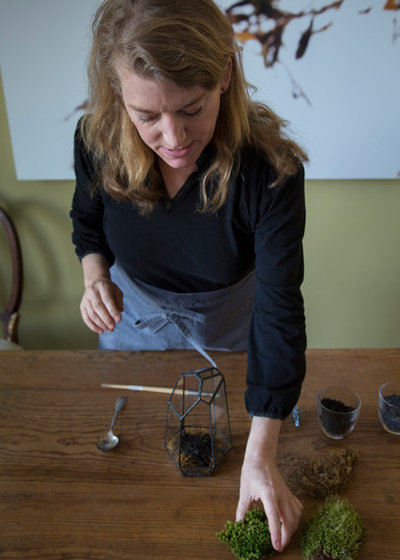
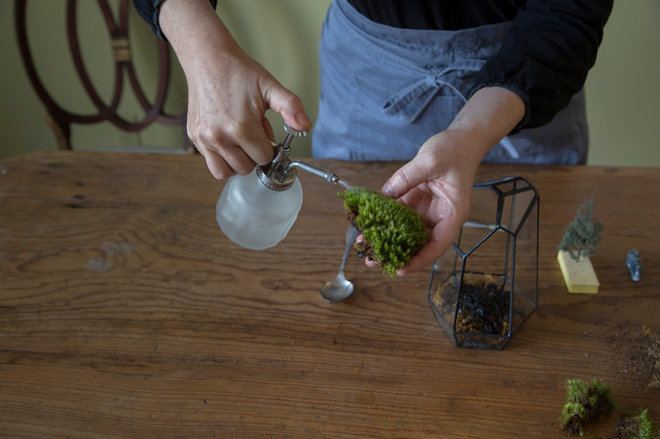
2. Take a piece of sheet moss about the size of the vessel’s base. Completely moisten the moss using the mister, and then wring out any excess water. Adding water to the moss will make it easier and less messy to work with.


Margot Hartford Photography

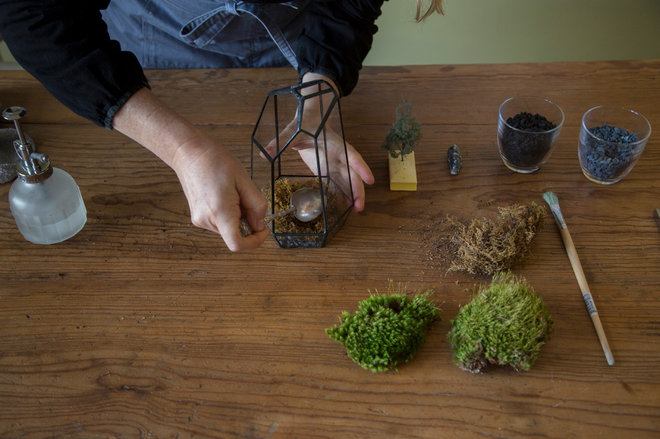
3. Place the sheet-moss layer on top of the rocks, trying to completely cover the rock layer below. Use the back of the spoon to tamp the moss into place and push it into the terrarium’s corners. The nonbrush end of the paintbrush can also help with this. The sheet moss will act as a barrier and keep the charcoal layer, to be added next, from mixing with the rocks below.


Margot Hartford Photography

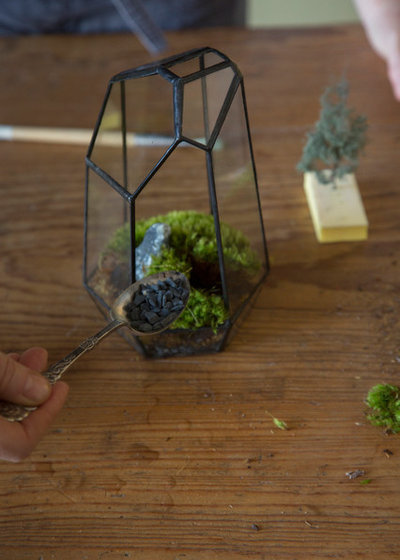
4. Add a layer of charcoal with the spoon, aiming to just cover most of the moss below. The charcoal will act as a filter and prevent any moisture in the terrarium from developing an unpleasant smell.

Now your terrarium’s base layers are set.


Margot Hartford Photography

5. Grab a piece of your cushion moss. Your cushion moss might have a thicker or thinner bottom layer. Depending on how you’d like your terrarium to look, you can keep the moss thick or cut off some of the thickness to create an interesting terrain.


Margot Hartford Photography

6. Completely moisten your piece of cushion moss with the mister, as you did with the sheet moss. Wring out any excess water.

You can leave the cushion moss as a larger piece if you like or break it into smaller pieces to create more of a landscape scene in the terrarium. Wait until after you moisten the moss to break it apart, as it will be more malleable and less messy.


Margot Hartford Photography

7. Place your cushion moss in the terrarium, starting with the largest piece. Chapman used a single piece of moss to cover about half of the base, but you can combine smaller pieces of cushion moss to create the composition you want.


Margot Hartford Photography

8. Add any sturdier accessories you like. Chapman included a black stone in this project for height and contrast.


Margot Hartford Photography

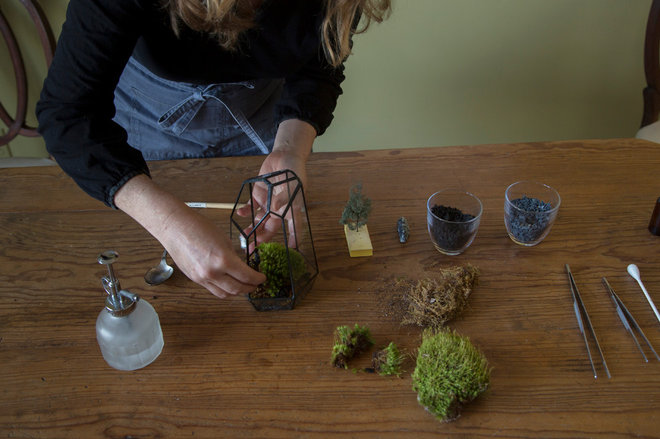
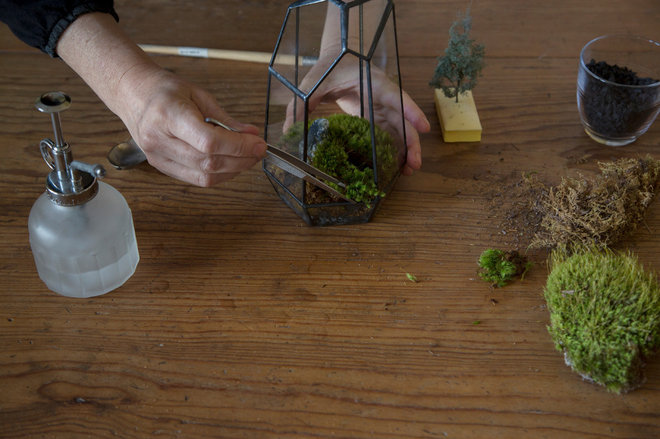
9. Add more cushion moss to the terrarium if you like, using tweezers to help place and tamp down the smaller, more delicate pieces. Create a scene that appeals to you from all directions. Cover most of the terrarium base with cushion moss or leave parts of the base exposed. Chapman placed a piece of moss that appears to be spilling out of the vessel, with gaps in the moss forming interesting shapes around the green.


Margot Hartford Photography

10. Fill in with rocks any places that don’t have cushion moss. You need to just cover the charcoal and sheet moss, so that the cushion moss is still taller than the surrounding rocks.


Margot Hartford Photography

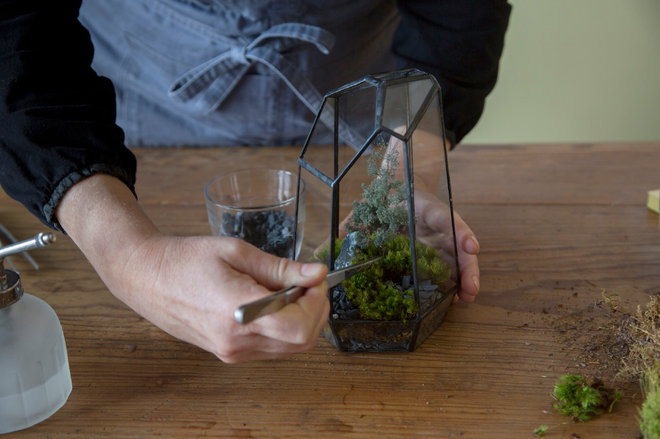
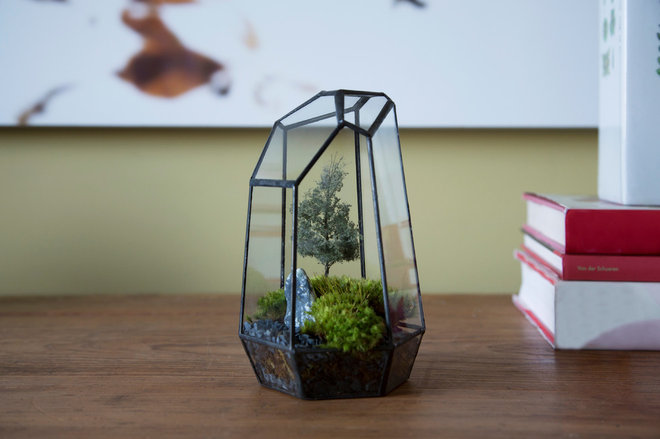
11. Add any other more delicate terrarium decor, such as an architectural model tree like the one seen here. You can use tweezers to help place the tree and tamp it into place.


Margot Hartford Photography

12. Clean the terrarium, using the paintbrush or an extra-large cotton swab to get rid of any dust, smudges or dirt that accumulated during the project.


Margot Hartford Photography

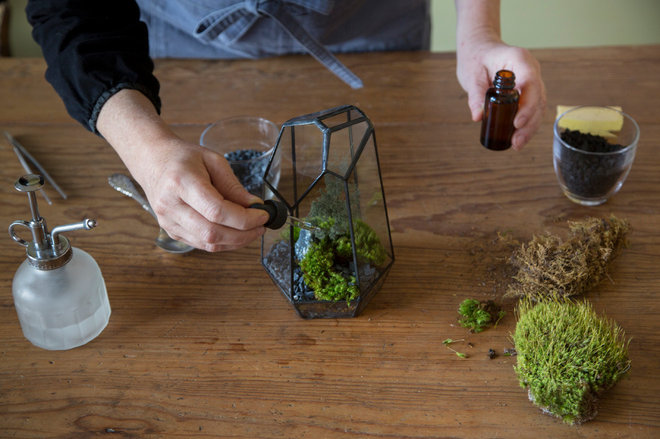
13. Water the moss with the medicine dropper, which will moisten the moss without getting the glass container dirty.


Margot Hartford Photography


Phyto

مدیر تالار مهندسی كشاورزی
مدیر تالار
How to Make a ‘Kokedama’ String Garden


Click "Embed" to display an article on your own website or blog.

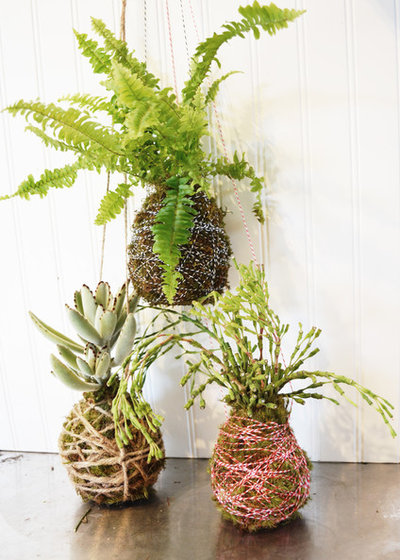
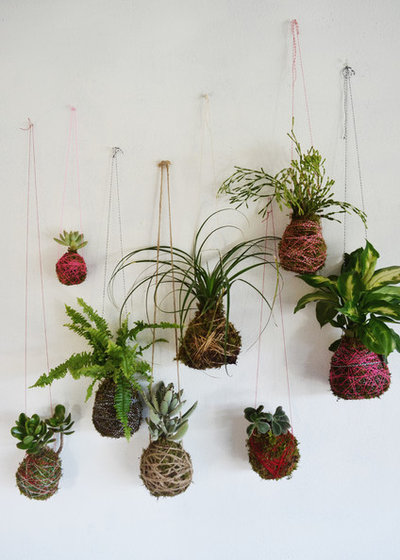
The first time I saw a wonderful display of kokedama, a variation of Japanese bonsai, hanging against a stark white wall, I never imagined how easy it would be to create this plant-and-string look. “Kokedama” means “moss ball” in Japanese; it is made by transferring a succulent, small fern or other plant into a ball of soil held together with moss and colorful string or twine, which is also used to hang the plants. These string gardens look great hanging in homes and are a fun way to bring the outdoors in. Follow along with floral designer Mandy Grace of Hawaii as she walks us through how to make a cool hanging-plant string garden.


Ashley Camper Photography

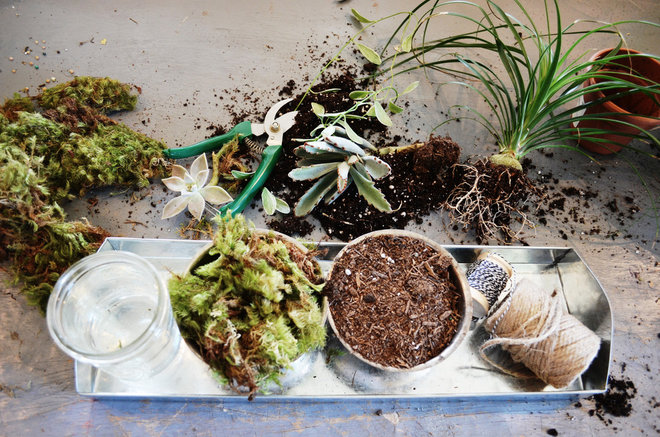
Materials and tools:


  • [*=left]Tiny plants (succulents and baby ferns work well)
    [*=left]Peat soil, cacti soil, clay mud
    [*=left]Dry sphagnum moss
    [*=left]Scissors
    [*=left]100 percent cotton thread
    [*=left]Nice, colorful packing string (twine and hemp are favorites)
    [*=left]Gloves (it will get messy)
    [*=left]Jar of water
    [*=left]Bowl (optional)


Ashley Camper Photography

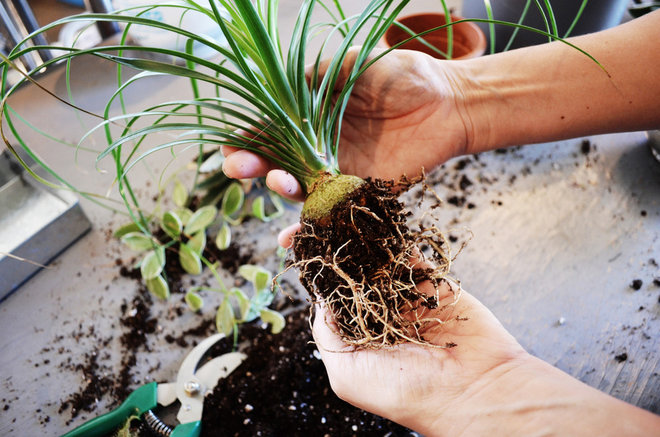
Remove as much soil as possible to expose the roots of your chosen plant. Be very thorough during this process, but also be very gentle.


Ashley Camper Photography

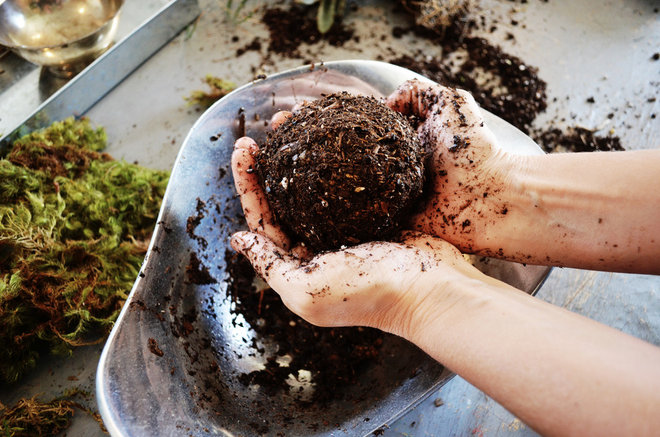
Mix peat soil, cacti soil and mud clay together; a bowl will help contain the mess. Then add just enough water so the soil begins to form a dough-like consistency. You should be able to form a small ball that won’t fall apart.


Ashley Camper Photography

Keep the ball of soil as small as possible, but make sure it is large enough to accommodate the roots of your plant.


Ashley Camper Photography

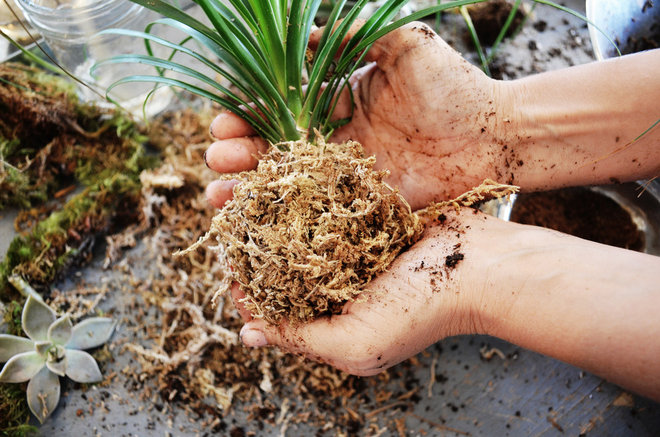
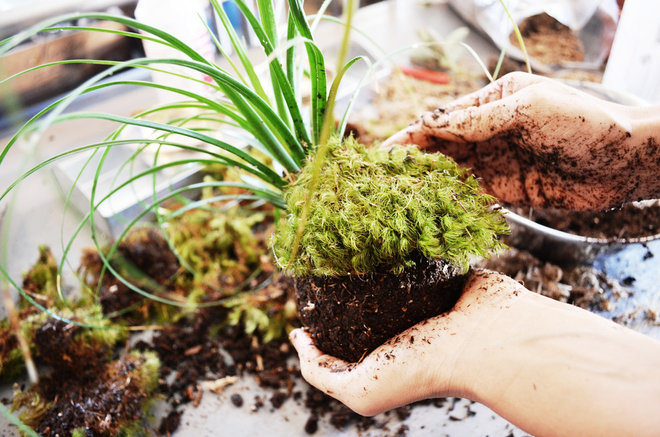
Take a bunch of dry sphagnum moss and wrap it carefully around the roots of your plant to form a circular, compact shape.


Ashley Camper Photography

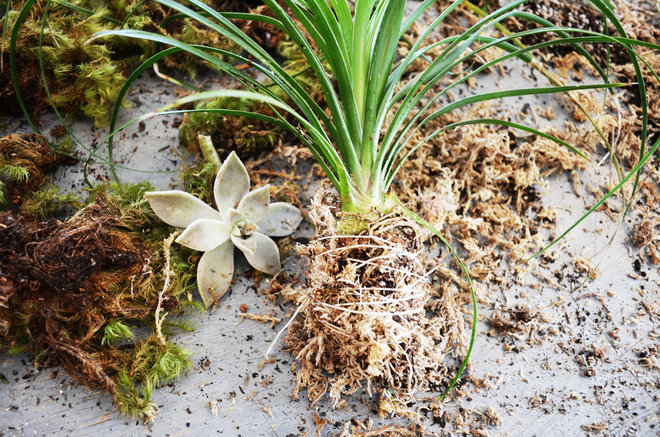
Then tie cotton string around the sphagnum moss to hold it in place.


Ashley Camper Photography

Make a small hole in your soil ball and gently press the plant inside it. Be sure to “close up” the soil to reform the spherical shape.

Now it’s time for the fun part. Take small sheets of moss and press them firmly into the soil. Don’t leave any open spaces.


Ashley Camper Photography

Wrap the string or twine around the ball as if you were packing a present, leaving enough extra string on each side to allow you to hang the plant. You can use natural or white string or else choose a color to go with your decor or the season.

Choose a nice spot that gets indirect light, install a hook and hang your wonderful planet of moss.


Ashley Camper Photography

Different plants require different amounts of food, water and sunlight to survive, so there are no one-size-fits-all rules, but here are some general guidelines for your indoor hanging garden:

Watering: Weight is a good indicator of when your hanging plant needs water. Hold the ball in your hand and see if it feels heavy. If it does, then the ball has enough water for the roots. If the ball feels light, then watering is needed. Fill a bowl with enough water to cover the ball. Place it in the water and let it soak for two to three minutes. Remove the ball and gently squeeze it to allow the water to soak into the center. This should be enough watering for several days.

Lighting, temperature and ventilation: Choose a hanging plant that will thrive on the amount of light you can provide. Most indoor plants prefer a humid atmosphere and indirect light. Proper ventilation is needed for growth.


بالا